Installation Guide

Fitting Your Watch Strap
Install your watch strap correctly for a proper and comfortable fit with maximized aesthetics. Here are the step-by-step instructions with demonstrations on video.
Before installing:
Prepare a proper workspace. Use a clean open surface like a table or countertop.
Put a towel on the surface to protect the watch and keep things together.
Get your spring bar tools ready here.
Work from the underside of the watch.
Two-Piece Watch Strap
1. Install the spring bars into the end of each strap.
2. The shorter band with the buckle goes on the top of the watch (12 o’clock). Insert one end of the spring bar into the hole on the watch lug.
3. Use the spring bar tool to compress the other end of the spring bar, and slide it into place. Make sure both ends are snapped securely.
4. Repeat the process on the longer band which attaches to the bottom of the lug (6 o’clock).

Single Pass Watch Strap
1. Secure the spring bars to the watch lug. Make sure both ends are snapped securely into their respective holes.
2. The buckle end of the band should be on the top of the watch (12 o’clock).
3. Loop the strap over the top spring bar, under the lug, and over the bottom spring bar.
4. Adjust accordingly, and you’re done!
A Clean Look
Installing a single pass watch strap is easy. But with the right adjustments, you can achieve a cleaner look from up top. This trick will help your watch sit flat on your wrist without keepers protruding at the sides.
1. Position the keeper of the strap about 3cm above the watch lug (12 o’clock position).
2. Upon securing the strap, the buckle will be closer to the lug below (6 o’clock position) instead of being at the center of your inner wrist.
3. The bulky parts of the buckle and keepers will be hidden underneath. Only one layer of strap will be visible from the top.

Two Ways to Loop
The length of a single pass watch strap can be adjusted according to your wrist size. There are two ways to fix the strap for adjustments.
The Firm Loop
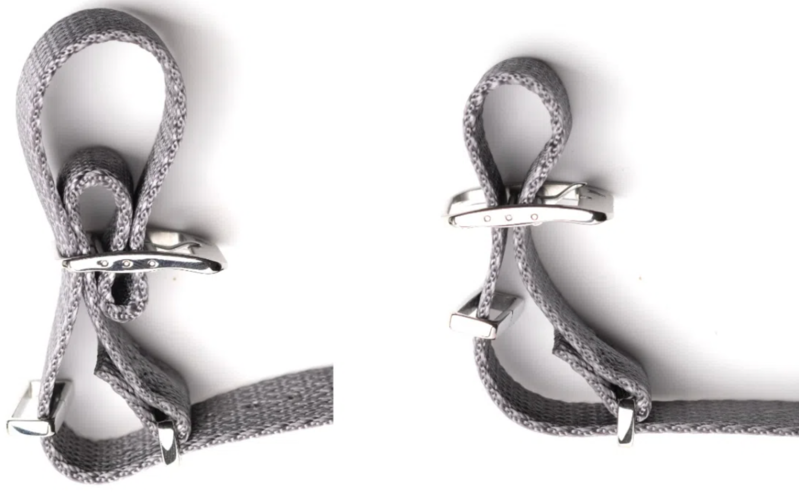
Requires a little more effort and practice, but the strap’s hold will be firmer and last longer. Refer to the video to set it up correctly. [embed video]
The Quick Adjustment Loop
Easier and faster to adjust, but the hold may loosen after some time. Refer to the video for the steps. [embed video]

